
Honda HRX537 Petrol Lawnmower - Cleaning
How to clean the petrol lawnmower after use.
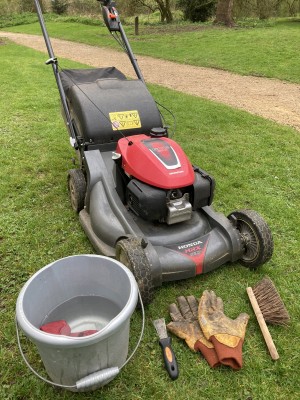
You will need gloves to protect your hands from sharp edges such as the cutting blade.
A stiff brush, a paint scraper, a bucket of water and a cleaning cloth.
For the first part of the cleaning operation it is best to place the machine on a grass surface.
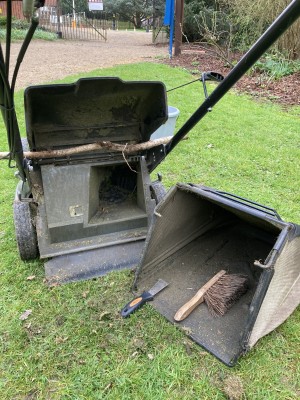
Dry clean the lawnmower using the stiff brush and the scraper before using any water.
Brush down the body and around the wheels.
Clean the ejection chute and the clippings bag.
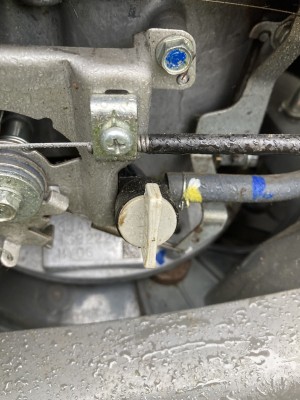
To clean the underneath of the lawnmower it must be tipped on it's side. Before doing this two safety precautions must be observed.
1. The fuel feed on the side of the engine should be switched to the off position. This is the vertical position as shown in the photograph.
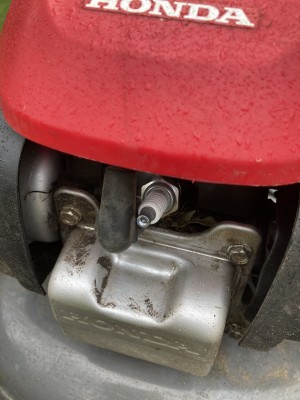
2. Gently, but firmly pull the spark plug lead from the spark plug on the front of the machine. Do not pull by the lead as this can damage the cable, but grasp the boot of the plug.

To clean around the underneath of the lawnmower it must be tipped on it's side.
Make sure that the lawnmower is tipped so that the air filter is pointing to the sky.
The air filter is a black plastic box with a yellow safety strip on the side (see photo).
If the air filter is towards the ground there is a possibility that engine oil will seep into it and decrease it's efficiency.

Use gloves when cleaning underneath the machine. It is easy to catch your hands on the blades or sharp edges.
Use the scraper to remove as much compacted soil and clippings from the blade housing as possible.

Clippings and soil often get trapped around the mulching door. Tilt the machine back to an upright position.
Push down on the green mulching mode lever and move it from left to right or vice-versa, to reverse it's original position.
Now tilt the machine on it's side once again, air-filter up. Now clean around the mulching door.
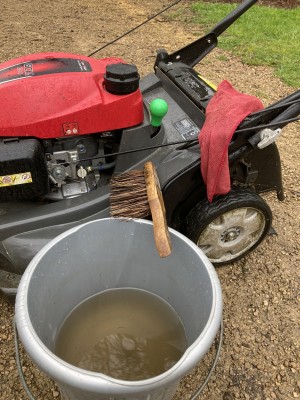
Now that dry cleaning has been completed use the brush, water and cloth to wet clean the housing of the machine.
Move the machine onto a hard surface for this part of the cleaning operation.
Start with the brush to loosen compacted or dried soil and clippings. Finish with the cloth.
Do not overuse water. Do not soak the engine, air filter or electrical leads.
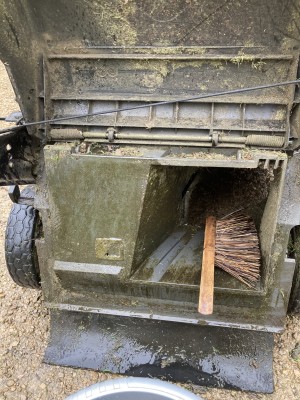
Using the brush and liberal amounts of water try to clean the ejection chute as thoroughly as possible.
Do not expect to get it completely clean. That is time consuming and unnecessary!
Finish by giving the body work and handles a good wipe down with the damp cloth.
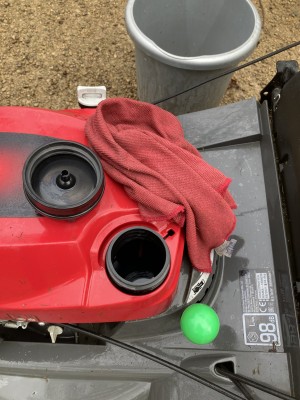
Carefully remove the black fuel filler cap and gently clean it and the body area around the fuel tank entrance.
This prevents dirt and contaminants being washed into the tank when filling during operation.
Wipe around the grey oil filler dipstick.

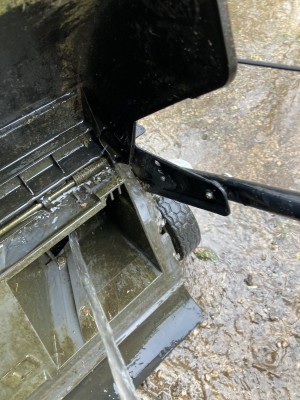
If time and circumstances permit a hose may be used to clean the lower more inaccessible areas of the machine.
Keep the water away from the engine block. A gentle pressure aimed towards the lower parts of the machine is what is required.
Start with the wheels and behind the wheels where soil and clippings get trapped.
The ejection chute and flap may be given a good hosing down.
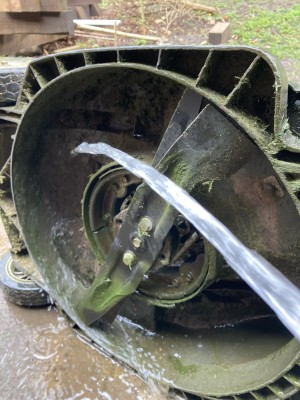
Once again tilting the machine on its side, air filter upwards, the blade enclosure can be given a good rinsing.
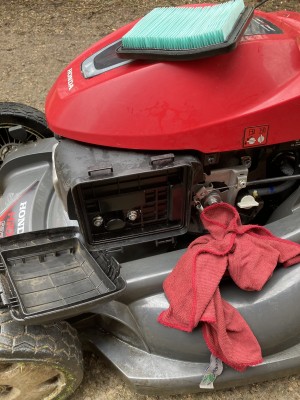
Finally, with an almost dry cloth, dismantle and wipe around the air filter assembly. Be careful not to wet the paper air filter itself.
Don't forget to wipe down and dry the spark plug and refit the spark plug lead.
Don't forget to turn the fuel feed lever on the side of the machine back to the on position, which is horizontal.